A coffee maker is an essential appliance for brewing coffee at home or in the office. Using a coffee maker with its manual ensures optimal performance, helping you achieve the perfect cup every time. With various types available, from drip to single-serve models, understanding your machine is key to enhancing your coffee experience.
Overview of Coffee Maker Types
Coffee makers come in various types, each offering unique brewing experiences. Drip coffee makers are popular for their convenience, using filters and automatic brewing. Pour-over coffee makers require manual effort, allowing control over the brewing process. French press involves steeping coarse grounds in hot water, producing rich flavors. Single-serve coffee makers use pods or capsules for quick, individual cups. Each type caters to different preferences and lifestyles, ensuring there’s a coffee maker for everyone. Understanding the features and operation of each type helps in selecting the right one for your needs, as outlined in most coffee maker manuals.
Importance of Using a Coffee Maker Manual
A coffee maker manual is essential for optimal use of your appliance. It provides detailed instructions for setup, brewing, and maintenance, ensuring you get the best results. The manual helps you understand the machine’s components, troubleshoot common issues, and perform routine cleaning and descaling. Without it, you might miss key settings or maintenance tips, affecting performance and longevity. Referencing the manual ensures safety, proper usage, and customization of brewing preferences; It’s a valuable resource for both new and experienced users, offering guidance tailored to your specific coffee maker model. Regularly consulting the manual helps maintain your machine and enhances your coffee-making experience.
Preparation Steps
Start by measuring the right coffee-to-water ratio and ensuring water is at the optimal temperature. Use a kitchen scale for precision and rinse the filter if needed.
Measuring Coffee and Water Ratio
Measuring the coffee and water ratio is crucial for a perfect brew. Typically, one standard coffee scoop (7-10 grams) is used per 6 ounces of water. Adjust the ratio based on your machine type and personal preference. For example, drip coffee makers may require a slightly different measurement than pour-over methods. Use a kitchen scale for accuracy, as precise measurements ensure consistent flavor. Too much coffee can make the brew bitter, while too little may result in a weak cup. Refer to your coffee maker’s manual for specific guidelines to achieve the ideal balance.
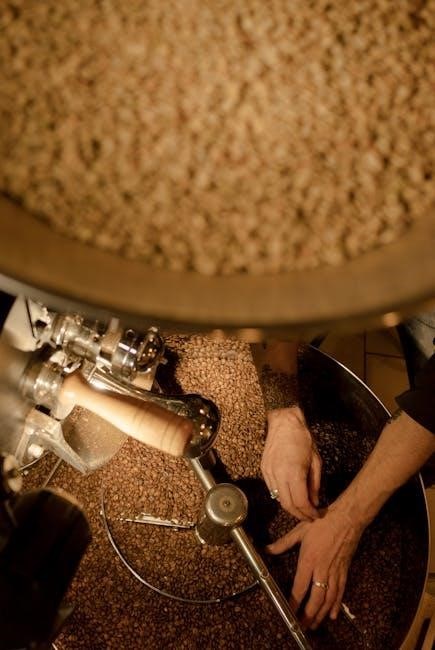
Choosing the Right Coffee Beans
Selecting the right coffee beans is essential for a delicious brew. Coffee beans vary by origin, roast level, and processing methods, each offering unique flavors. Arabica beans are known for their mild, nuanced taste, while Robusta beans provide a bolder, more bitter flavor. Lighter roasts retain more acidity and fruity notes, while darker roasts offer deeper, richer flavors. Freshness is key, so opt for beans roasted within the past week. Store beans in an airtight container to preserve aroma and flavor. Experiment with different types to find your preference, and consider single-origin beans for distinct regional tastes. Always choose high-quality beans suited to your coffee maker type for the best results.
Grinding Coffee Beans for Optimal Flavor
Grinding your coffee beans just before brewing ensures maximum flavor and aroma. The grind size should match your coffee maker type—fine for espresso, medium for drip, and coarse for French press. Use a burr grinder for consistent results, as blade grinders can generate heat, damaging the beans. Store beans in an airtight container to preserve freshness. Experiment with grind sizes to find the perfect balance for your machine, ensuring optimal extraction. Proper grinding enhances the coffee’s flavor profile, making it a crucial step in the brewing process. Always grind immediately before brewing to enjoy the best taste and aroma from your beans.

Setting Up Your Coffee Maker
Setting up your coffee maker involves unboxing, assembling, and positioning it in a suitable location. Ensure all parts are securely fitted and the machine is ready for first use.
Unboxing and Initial Assembly
When you unbox your coffee maker, carefully inspect all components to ensure nothing is damaged. Most machines come with a water reservoir, filter basket, and power cord. For initial assembly, follow the manual’s step-by-step guide to attach any removable parts, such as the drip tray or carafe. Rinse all parts with warm water before first use to remove any manufacturing residue. Once assembled, place the machine on a flat, stable surface, ensuring the power cord is safely positioned away from water sources. Proper assembly ensures safe and efficient operation, helping you brew perfect coffee right from the start.
Placing the Machine in an Ideal Location
Positioning your coffee maker in the right location is crucial for safe and efficient operation. Place it on a flat, stable, and heat-resistant surface, such as a countertop, ensuring it is away from water sources to prevent accidental damage. Avoid areas near direct sunlight or heat vents, as this can affect the machine’s performance. Keep the coffee maker at least 4-6 inches away from walls or other appliances to allow proper ventilation. Ensure the power cord is within easy reach of an electrical outlet to avoid using extension cords. Proper placement enhances safety, prevents moisture buildup, and ensures your coffee maker functions optimally for years to come.
Understanding Machine Components
To use your coffee maker effectively, it’s essential to understand its components. The water reservoir holds the water supply, while the heating element warms the water to the ideal temperature. The brew basket or filter holder is where the coffee grounds go, and the carafe collects the brewed coffee. Additional features may include a control panel for settings, a timer for scheduling, and a grinder for fresh beans. Familiarize yourself with these parts to ensure proper operation. Refer to your manual for specific details, as components may vary by model. Understanding your machine’s anatomy will help you brew perfectly and troubleshoot issues with ease.
Brewing Instructions
Add coffee grounds to the filter, pour water into the reservoir, and select your desired settings. The machine will heat the water and brew your coffee automatically.
Using a Drip Coffee Maker
To use a drip coffee maker, start by adding coffee grounds to the filter. Pour fresh water into the reservoir, ensuring it reaches the recommended level. Next, place the filter basket into the machine and select your desired brew settings. Turn on the coffee maker, and it will heat the water and drip it through the grounds. The coffee will collect in the pot. Adjust the coffee-to-water ratio for your preferred strength. Regularly clean the machine to prevent mineral buildup. For best results, use fresh, cold water and the correct grind size for your maker.
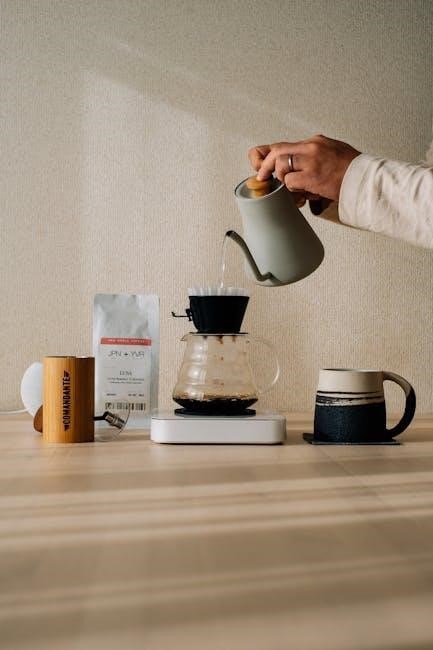
Operating a Pour-Over Coffee Maker
Pour-over coffee makers offer a manual brewing method that allows for precise control over flavor. Start by placing a filter in the cone and rinsing it with hot water to remove any paper taste. Add the desired amount of coffee grounds, ensuring an even layer. Carefully pour hot water (around 200°F) over the grounds in a circular motion, first saturating all grounds, then pouring in the rest. Allow the coffee to drip through the filter into the pot. This method requires patience but delivers a clean and flavorful cup. Adjust the coffee-to-water ratio and pour speed to customize your brew.
How to Use a French Press Coffee Maker
Using a French press coffee maker is a straightforward process that involves steeping coarse coffee grounds in hot water. Start by measuring the right amount of coffee, typically one tablespoon per six ounces of water. Pour the water into the French press, ensuring it reaches the recommended temperature of around 200°F. Add the coffee grounds, stir gently, and let it steep for about four minutes. After steeping, slowly press the plunger down to separate the grounds from the liquid. Pour the coffee immediately to prevent over-extraction. Clean the French press thoroughly after each use to maintain flavor quality and hygiene.
Brewing with a Single-Serve Coffee Maker
Brewing with a single-serve coffee maker offers convenience and quick results. Start by inserting a compatible coffee pod into the machine. Ensure the water reservoir is filled, then select your desired cup size or brew strength. Place a cup under the spout, close the pod compartment, and press the brew button. The machine will puncture the pod and force hot water through it, filling your cup with fresh coffee. After brewing, discard the used pod and rinse the machine if needed. Using the correct type of pod for your machine is crucial to avoid poor flavor or damage. This method is ideal for those who want a fast, mess-free coffee experience.
Maintenance and Care
Regular cleaning and descaling are vital to prevent mineral buildup and maintain flavor. Replace filters and parts as needed to ensure optimal performance and water quality. Always dry the machine after cleaning to prevent mold.
Cleaning the Coffee Maker Regularly
Regular cleaning is essential to maintain your coffee maker’s performance and hygiene. Mix equal parts water and white vinegar, then run the solution through the machine to remove mineral buildup and bacteria. Rinse thoroughly with fresh water to eliminate any vinegar taste. For manual models, soak removable parts in warm soapy water and scrub gently. Dry all components after cleaning to prevent mold growth. Descaling every 1-3 months, depending on usage, ensures optimal brewing quality. Refer to your machine’s manual for specific cleaning instructions, as different models may require unique care. A clean coffee maker guarantees better-tasting coffee and longer machine life.
Descaling Your Coffee Maker
Descaling your coffee maker is crucial to remove mineral buildup from water, which can affect taste and machine efficiency. Mix a solution of water and lemonade or a descaling product as per the manual. Run the solution through the machine, then rinse thoroughly with fresh water to remove any residue. Repeat if necessary to ensure all minerals are eliminated. Descaling frequency depends on usage, typically every 1-3 months. Regular descaling prevents clogs, ensures optimal brewing temperature, and extends the machine’s lifespan. Always refer to your coffee maker’s manual for specific descaling instructions, as procedures may vary by model. A well-maintained machine brews better coffee consistently.
Replacing Filters and Parts
Regularly replacing filters and parts in your coffee maker is essential for maintaining its performance and the quality of your coffee. Water filters should be replaced every 1-2 months to prevent mineral buildup and ensure clean water flow. Metal filters can be reused but should be cleaned and descaled periodically. For paper filters, replace them with each use to avoid residue buildup. Check your manual for specific replacement intervals and compatible parts. Always purchase replacement parts from authorized dealers to guarantee compatibility and quality. Neglecting to replace worn or dirty filters can lead to scaling issues, poor flavor, or even machine malfunction. Proper maintenance ensures your coffee maker continues to deliver great results.
Troubleshooting Common Issues
If your coffee maker isn’t turning on, check the power supply and ensure it’s properly plugged in. For poor flavor, adjust the coffee-to-water ratio or descale the machine. Leaks often result from loose connections or worn seals, which can be tightened or replaced. Refer to your manual for specific solutions and maintenance tips to resolve issues effectively and maintain optimal performance.
Why Your Coffee Maker Isn’t Turning On
If your coffee maker isn’t turning on, start by checking the power source. Ensure the plug is securely inserted into a functioning outlet. Verify that the outlet hasn’t tripped or blown a fuse. Next, inspect the power cord for any visible damage or frays. If using a surge protector, confirm it’s working correctly. Consult your manual for specific troubleshooting steps, as some models may have a reset button or require a power cycle. If issues persist, contact customer support or consider professional repair to diagnose internal electrical problems.
Fixing Poor Coffee Flavor
Poor coffee flavor can often be traced to the water quality, coffee-to-water ratio, or improper brewing techniques. Start by using fresh, filtered water, as impurities or odors can affect taste. Ensure the coffee-to-water ratio is balanced, typically 1 tablespoon of coffee for every 6 ounces of water. Use filtered water to prevent mineral buildup. Clean or replace the water filter regularly and descale your machine as recommended. Old or stale coffee beans can also impact flavor, so grind fresh beans just before brewing. Additionally, check the grind size for your specific coffee maker, as incorrect sizing can lead to under- or over-extraction. Regularly clean the machine to remove any residual oils or buildup that may alter the taste.
Addressing Leaks or Water Issues
Leaks or water issues in your coffee maker can disrupt brewing and damage the machine. Start by checking the water reservoir and hoses for cracks or misalignment. Ensure all connections are secure and tightly sealed. If water leaks from the brew basket, inspect the gasket or seal for wear and tear; Replace any damaged parts promptly. For internal leaks, descale the machine to remove mineral buildup that may be causing blockages. Regularly cleaning the machine and using filtered water can prevent corrosion and reduce the risk of leaks. Always refer to your coffee maker’s manual for specific troubleshooting steps tailored to your model.
Advanced Brewing Techniques
Mastering advanced brewing involves adjusting brew strength, experimenting with coffee-to-water ratios, and customizing steeping times for a personalized flavor. Use precision temperature control and advanced grinding techniques to elevate your coffee game.
Adjusting Brew Strength and Flavor
Adjusting brew strength and flavor involves tweaking coffee-to-water ratios, grind size, and steeping time. A finer grind and longer steeping time yield stronger coffee, while coarser grinds produce lighter flavors. Experiment with ratios; for example, 1:15 for a lighter brew or 1:10 for a bolder cup. Temperature also plays a role, with optimal brewing between 195°F and 205°F. Refer to your coffee maker’s manual for specific guidance on customization. Regularly cleaning and descaling your machine ensures consistent flavor. By mastering these adjustments, you can tailor your coffee to suit your taste preferences perfectly.
Using Different Coffee Roasts
Exploring various coffee roasts can elevate your brewing experience. Lighter roasts offer bright acidity and fruity notes, while darker roasts provide rich, bold flavors. Medium roasts balance acidity and body, making them a popular choice. When using your coffee maker, consider the roast level to tailor the flavor profile. For instance, lighter roasts may require a slightly shorter brewing time to avoid bitterness. Experiment with different roasts to find your preference. Refer to your coffee maker’s manual for guidance on adjusting settings for optimal results with each roast type. This customization ensures every cup is crafted to your taste, enhancing your coffee-making journey.
Customizing Brewing Time
Customizing brewing time allows you to tailor your coffee’s flavor profile. Adjusting the steeping or brewing duration can enhance or balance the taste. For instance, shorter times preserve bright acidity, while longer times intensify bold flavors. Lighter roasts typically benefit from shorter brewing, preventing bitterness, while darker roasts may thrive with slightly extended times. Experiment with your coffee maker’s settings to find the perfect balance. Many manual or pour-over models offer precise control, enabling you to fine-tune each brew. Refer to your coffee maker’s manual for specific guidance on adjusting time settings. This customization ensures your coffee is crafted to your exact preference, whether you prefer a delicate or robust cup.
Safety Precautions
Always handle hot components with care and keep the machine out of children’s reach. Ensure the area is clear of flammable materials and avoid overloading outlets. Follow the manual’s guidelines for safe operation and maintenance to prevent accidents. Regularly inspect cords and plugs for damage. Never leave the coffee maker unattended during operation. Store the machine in a dry, cool place when not in use. Proper ventilation is essential to avoid moisture buildup. Adhere to these precautions to ensure a safe and enjoyable coffee-making experience.
Handling Hot Components Safely
When using a coffee maker, always handle hot components with caution to avoid burns. Use oven mitts or towels to grip hot carafes or brewers. Never touch heating elements or surfaces that are in direct contact with hot water. Keep the machine on a stable, heat-resistant surface, away from flammable materials. Ensure children are kept at a safe distance from the coffee maker while it is in operation. Avoid wearing loose clothing that could accidentally come into contact with hot parts. If you must move the machine, always unplug it first and allow it to cool before handling; Proper care and attention can prevent accidents and ensure safe operation.
Preventing Electrical Hazards
To prevent electrical hazards when using a coffee maker, ensure the machine is placed on a dry, stable surface away from water sources. Avoid overloading electrical outlets or using frayed cords. Regularly inspect the power cord for damage and replace it if necessary. Never submerge electrical components in water, and keep the coffee maker away from flammable materials. If you notice sparks or unusual odors, unplug the machine immediately and consult the manual or contact a professional. Using a surge protector can also safeguard against power surges. Always unplug the coffee maker when not in use or during cleaning to ensure safety.
Storing the Coffee Maker Properly
Proper storage of your coffee maker ensures longevity and prevents damage. After use, clean and dry the machine thoroughly to avoid mold or mineral buildup. Store it in a cool, dry place away from direct sunlight and moisture; If storing for an extended period, consider using the original packaging or a protective cover to shield it from dust. Unplug the machine and store the power cord separately to prevent tangles or damage. For seasonal storage, descale the coffee maker beforehand and ensure all parts are completely dry. This will help maintain its performance and readiness for future use.
Additional Resources
For detailed guides, visit the manufacturer’s website for user manuals and FAQs. Many brands like Krups offer resources to help you troubleshoot and maintain your coffee maker effectively.
Where to Find User Manuals Online
To access user manuals for your coffee maker, visit the manufacturer’s official website. Most brands, like Krups and Nespresso, provide downloadable PDF manuals. Simply search the brand name and model in the website’s search bar. Additionally, platforms like ManualsLib or ManualsOnline offer a vast library of manuals for various coffee maker models. Ensure you enter the correct model number for accurate results. These resources are ideal for troubleshooting, understanding features, or guiding you through maintenance. Always verify the source to ensure you’re downloading the correct and latest version of the manual for your specific coffee maker model.
Frequently Asked Questions
Common questions about coffee makers include optimal water temperature, ideal coffee-to-water ratios, and troubleshooting issues like poor flavor or machine malfunctions. Users often ask about the importance of descaling, which prevents mineral buildup and ensures longevity. Another frequent query is about compatible pods or filters for specific models. Understanding grind size for different brewing methods is also a popular topic. Additionally, many seek advice on how to clean and maintain their machines effectively. Referencing the user manual can address these concerns, providing tailored guidance for your particular coffee maker model to ensure the best brewing results and proper machine care.